Using ActiveCampaign Forms in React
Posted February 10, 2020 in Tech
ActiveCampaign is an amazing service, however integrating it into your projects can be a huge pain. Usually you have some plugin to buy and install that ends up being a buggy, hacked together workaround that you end up just rewriting yourself in the end. Well, here I am again, only this time in a React/Gatsby project.
I found an awesome post by Sara Gibbons that was extremely useful in getting the ActiveCampaign form into React, however I needed the error handling capabilities and other awesome features React Hook Form ships with. Another extremely useful resource I ran across was a post by Joe Seifi which served as a crash course into React Hook Form.
I’m also making the assumption that you’re comfortable working with ActiveCampaign and you’re a better React developer than I am! 😄
Lastly, this is more of a brain dump than a tutorial or a guide. Hopefully it helps someone out there save some time.
Let’s get to it!
import React from 'react'
import { useForm } from 'react-hook-form'

export default function ActiveCampaignForm({ custom, showPhone, requirePhone }) {
  const { register, handleSubmit, errors } = useForm()

  const onSubmit = data => {
    try {
      //Need to rename a few fields to get this to work with activecampaign
      let preppedData = {'field[14]': data.custom, ...data}

      //Remove the old custom field (renamed above)
      const { custom, ...cleaned  } = preppedData

      //Convert to FormData
      let form_data = new FormData()
      for ( let key in cleaned ) {
        form_data.append(key, cleaned[key])
      }

      fetch('https://YOUR-AC-SUBDOMAIN.activehosted.com/proc.php', {
        method: 'POST',
        mode: 'no-cors',
        cache: 'no-cache',
        body: form_data,
      })
    } catch (error) {
      // handle server errors
      console.log("Request failed", error)
    }
  }

  const showForm = (
    <form onSubmit={handleSubmit(onSubmit)} method="post">
      <input type="hidden" name="u" value="YOUR-FORM-ID" ref={register({ required: true })}/>
      <input type="hidden" name="f" value="YOUR-FORM-ID" ref={register({ required: true })}/>
      <input type="hidden" name="s" ref={register({ })}/>
      <input type="hidden" name="c" value="0" ref={register({ required: true })}/>
      <input type="hidden" name="m" value="0" ref={register({ required: true })}/>
      <input type="hidden" name="act" value="sub" ref={register({ required: true })}/>
      <input type="hidden" name="v" value="2" ref={register({ required: true })}/>

      <input type="hidden" name="custom" value={custom} ref={register({ required: true })}/>

      <input type="text" placeholder="Name" name="fullname" ref={register({required: true, maxLength: 80})} />
      <input type="text" placeholder="Email" name="email" ref={register({required: true, pattern: /^\S+@\S+$/i})} />

      {showPhone && (
        <input type="tel" placeholder="Phone number" name="phone" ref={register({required: requirePhone, minLength: 6, maxLength: 12})} />
      )}

      <input type="submit" />
    </form>
  )

  return (
    <div>
      {showForm}
    </div>
  )
}
A few notes and things you might need…
Install react-hook-form
Nothing fancy here, just need to install react-hook-form into your project…
npm install --save react-hook-form… and finally include it into your component.
import { useForm } from 'react-hook-form'Get your subdomain for ActiveCampaign
- You will need your subdomain for your ActiveCampaign account. You should already know what this is, or be able to find this in your ActiveCampaign account. You can also find it in the embed code for the form we’re going to look at shortly.
(Eg., YOUR-AC-SUBDOMAIN.activehosted.com)
Get your form ID and form details
- You need your form id and form markup which can be found here:
YOUR-AC-SUBDOMAIN.activehosted.com/app/forms.
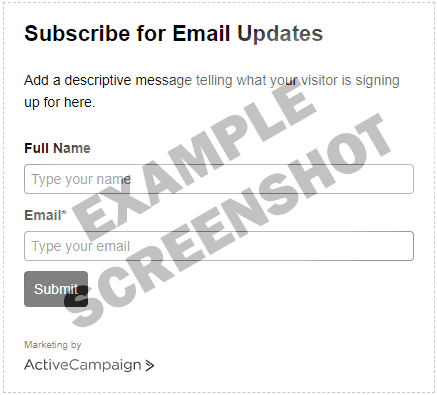
Here is what the form builder looks like
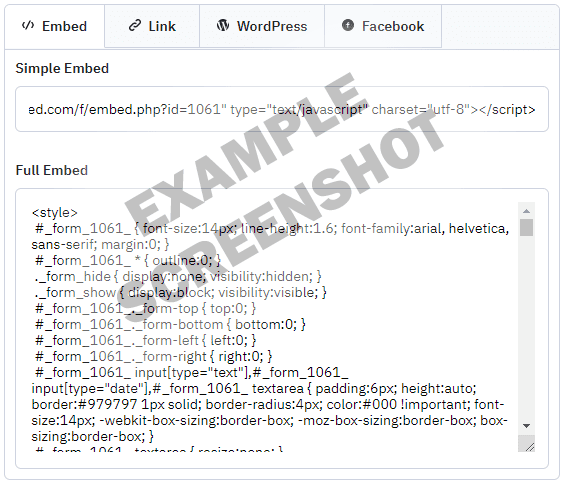
Here is where you’re going to extract your FORM-ID
In the component code we saw earlier, make sure you replace YOUR-FORM-ID with your numeric form-id which can be found in your embed code (you will need to scroll through it to find it).
<input type="hidden" name="u" value="YOUR-FORM-ID" ref={register({ required: true })}/>
<input type="hidden" name="f" value="YOUR-FORM-ID" ref={register({ required: true })}/>
You will also need to replace YOUR-AC-SUBDOMAIN with your actual subdomain in the fetch call.
fetch('https://YOUR-AC-SUBDOMAIN.activehosted.com/proc.php', {Now what? You’re really going to leave me here?
As I mentioned, this was more of a brain dump and a few notes that I hope will help someone getting started on integrating ActiveCampaign with Gatsby or React. This should be enough to get you going, however there were a few oddities I ran into that may help you save time.
What is that try block doing?!
You’ll notice a try block that seems to be doing some strange stuff.
This is because react-hook-form wasn’t a big fan of me using square brackets in the field names, which ActiveCampaign uses in all of its custom field names. So what we have to do is name the custom field something simple like in the example below…
<input type="hidden" name="custom" value={custom} ref={register({ required: true })}/>and then rename it back to what ActiveCampaign is expecting when we finally submit the form.
//Need to rename a few fields to get this to work with activecampaign
let preppedData = {'field[14]': data.custom, ...data}

//Remove the old custom field (renamed above)
const { custom, ...cleaned  } = preppedData
You’ll also notice that we’re calling FormData() and passing all the fields in so multipart/form-data data gets posted to ActiveCampaign and not something like JSON.
//Convert to FormData
let form_data = new FormData()
for ( let key in cleaned ) {
  form_data.append(key, cleaned[key])
}
In the fetch call, notice that mode: 'no-cors' is set. There is one headache you can avoid.
Lastly in the form itself you’ll see a few if/then statements. I left these because you might want to do something like this too.
{showPhone && (
    <input type="tel" placeholder="Phone number" name="phone" ref={register({required: phoneRequired, minLength: 6, maxLength: 12})} />
)}
If for example you want to sometimes collect a phone number, well you can do that pretty easily when you’re calling the component.
<ActiveCampaignForm
	showPhone={true}
	requirePhone={true}
/>
Well I hope that helps. I realize it’s more of a mess of notes than any sort of guide however I wish I had access to it when I started this project. 🙂

